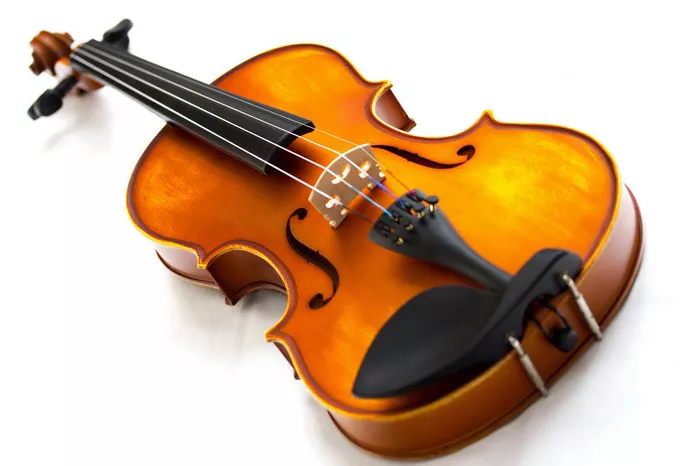
The process of stringing a violin with fine tuners requires precision, patience, and a keen understanding of the instrument. Whether you’re a seasoned musician or a novice, this step-by-step guide will help you navigate the intricacies of stringing your violin with fine tuners, ensuring optimal performance and sound quality.
I. Gather the Necessary Tools and Materials
Before diving into the stringing process, gather all the tools and materials you’ll need. Ensure you have a set of high-quality violin strings, fine tuners, a soft cloth, and a pair of pliers. It’s crucial to use the appropriate strings for your skill level and musical preferences, so consult with a music professional if you’re unsure.
II. Remove the Old Strings
Begin by loosening and removing the old strings from your violin. Turn the tuning pegs counterclockwise until the tension is released, and carefully unwind the strings from the tailpiece. Use a soft cloth to clean the instrument’s body and remove any rosin residue that may have accumulated.
III. Prepare the Fine Tuners
Inspect the fine tuners on the tailpiece to ensure they are in good condition. If any fine tuners are damaged or excessively worn, consider replacing them before proceeding. Lubricate the fine tuners with a small amount of violin peg compound to ensure smooth operation.
IV. Install the Strings
Starting with the G string (the thickest string), insert one end into the corresponding fine tuner on the tailpiece. Make sure the string is securely seated in the groove of the fine tuner. Continue this process for the D, A, and E strings, working from thickest to thinnest.
V. Thread the Strings Through the Tailpiece and Bridge
Once the strings are attached to the fine tuners, thread them through the holes in the tailpiece. Ensure that each string sits snugly in its respective groove. Carefully guide the strings over the bridge, making sure they are properly positioned on the bridge’s notches.
VI. Wind the Strings onto the Pegs
Insert the other end of each string into its corresponding peg. Turn the pegs clockwise to tighten the strings, ensuring even tension. Be cautious not to over-tighten, as this can lead to damage or breakage. Leave enough slack on the strings to allow for fine-tuning adjustments later.
VII. Fine-Tune the Strings
With the initial winding complete, use the fine tuners to make precise adjustments to the pitch of each string. Turn the fine tuners clockwise to raise the pitch and counterclockwise to lower it. Fine-tuners provide a more controlled and subtle means of adjusting pitch compared to the main tuning pegs.
VIII. Check for Proper Alignment and Tension
As you fine-tune each string, regularly check for proper alignment over the bridge and at the nut. Ensure that the strings sit comfortably in their respective grooves, and examine the overall tension of the strings. A well-strung violin should have balanced tension across all strings.
IX. Stretch the Strings
After the initial tuning, play each string and gently stretch them by pulling them away from the fingerboard. This helps to settle the strings and minimizes the likelihood of detuning during play. Continue fine-tuning as needed until the desired pitch is achieved.
X. Final Adjustments
Once the strings have settled and reached stable tension, make any final adjustments to ensure optimal intonation and tonal quality. Play scales, arpeggios, and passages from your repertoire to assess the instrument’s overall responsiveness and resonance.
In conclusion
Stringing a violin with fine tuners is a meticulous process that greatly influences the instrument’s playability and sound quality. By following this step-by-step guide and exercising patience and precision, you can achieve a well-strung violin that enhances your musical performance. Regular maintenance and attention to detail will contribute to the longevity of your instrument and the enjoyment of your playing experience.


